We show you how to quickly and easily expand your working memory and what kind of things you have to pay attention to.
Upgrading RAM is one of the easiest and cheapest ways to increase the performance of your PC or even laptop. But which one is compatible with your PC and are there performance differences? In this guide, we show you what to look out for when buying and how to install the RAM.
What is memory and what does it do?

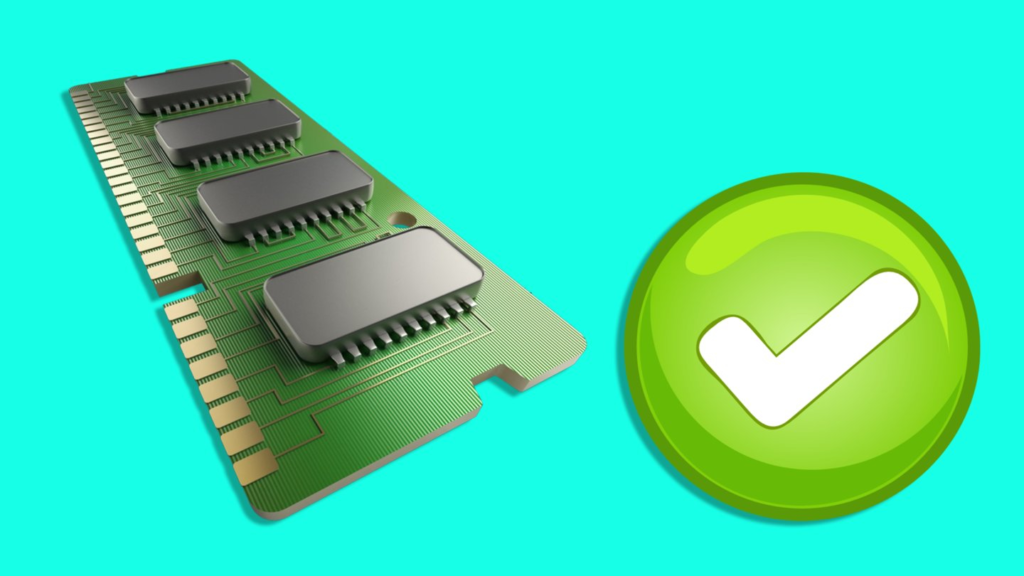
This is what a main memory module looks like. They are also simply called RAM sticks.
Memory, also known as RAM (Random Access Memory), is an important part of a computer.
Imagine you are a chef in a well-equipped kitchen, preparing an elaborate menu. The work table is your PC on which you have placed the ingredients and utensils that you need to work. The fridge is your SSD or HDD storage. You can store all the food you need for cooking there and get it out when needed.
This is where the RAM comes into play. It’s like a big pantry that’s placed right next to your worktop. You can store ingredients and tools in it that you will need in the near future and access them quickly. So it’s a lot quicker to get them out of the pantry than having to go to the fridge every time. This pantry is your working storage.
The RAM, therefore, offers additional storage space to store data and programs that you are currently actively using. The more RAM the computer has, the more information it can keep “at hand” at one time without having to constantly access the hard drive.
Much like the pantry allows you to keep essential ingredients and tools within reach, more RAM allows you to access data quickly and complete tasks efficiently.
In contrast to HDDs and SSDs, RAM memory is significantly faster and is therefore perfect for caching temporary data.
How do I read the RAM specifications?
Like any computer component, RAM has a number of terms and numbers that might be confusing at first glance. Here is an overview of these and what they mean:
- Capacity: The capacity indicates how much storage space the main memory offers, measured in gigabytes (GB). A larger capacity means more space to store programs and data, and your PC can handle more tasks at the same time.
- Type/Generation: The type or generation of memory refers to the technological evolution and supported speeds. Examples of RAM types are DDR4 and DDR5. Newer generations usually offer improved performance and efficiency.
- Clock Frequency/Speed: The clock frequency or speed of RAM indicates how fast the memory can transfer data, measured in megahertz (MHz) or gigahertz (GHz). A higher clock frequency means faster data processing and improved performance.
- Latency Times: Memory latency times indicate how quickly it can respond to requests. They are usually represented as a series of numbers, such as CL16-18-18-38. The lower the latencies, the faster the RAM is in serving data.
- Form Factor: Form factor refers to the physical size and design of the RAM module. The most common form factors for desktop computers are DIMM (Dual In-Line Memory Module) and SODIMM (Small Outline DIMM) for laptops and small devices.
- Voltage: The voltage indicates how much electrical energy the main memory needs to function properly. Typical voltages are 1.2 V for DDR4 and 1.35 V for DDR3.
- What are single and dual channels?
- Imagine, your RAM in single-channel operation is a single-lane highway with all cars driving on it. This can lead to bottlenecks.
- In contrast, working memory in dual-channel mode is like a two-lane highway. Cars can now drive in both lanes in parallel, resulting in faster data transmission and doubling the bandwidth.
- When you transfer data from the hard drive or SSD to the processor, the data is like cars on the freeway. In single-channel operation, the cars have to drive one behind the other in the only lane. This can lead to congestion as the data has to be transferred one at a time, which takes time.
- In dual-channel operation, however, the data can travel in both lanes in parallel. The traffic on the Autobahn is more fluid due to the division into two lanes.
- In order to benefit from this, it is necessary that you plug the two modules into the correct slots on your mainboard. In most cases, RAM slots that belong together have the same color. If in doubt, you should open the manual for your mainboard.
- So if you want to upgrade your RAM, it is advisable to buy a kit with two RAM modules. A kit with two 8GB sticks is better than a single 16GB one.
Which memory is compatible?
There are two easy ways to find out what type of RAM fits in your PC:
- Open the PC and take a look.
- Download a program that can tell you.
If you want to use a tool that tells you exactly what type of RAM is installed on your PC, then we recommend the CPU-Z tool.
- Download and install CPU-Z.
- Start the program and open the » Memory « tab
- Here you can see what type of RAM you have, how much capacity you have, and whether it is running in dual or single-channel mode. Feel free to take a screenshot.
- In the SPD (Serial Presence Detect) tab, you can check which slots are occupied and which are free.
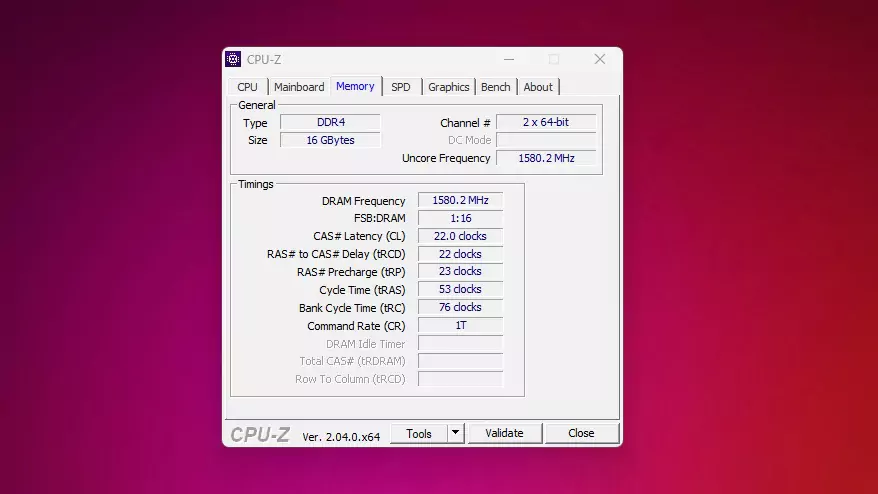
How to read the data from CPU-Z:
- Type: The type or generation of your RAM (DDR3, DDR4, DDR5, etc.)
- Channel: The operating mode of your working memory
- DRAM Frequency: This is the memory clock of the RAM. Here you can see that the manufacturer’s MHz specification is somewhat misleading. For the actual transmission speed in MT/s, you have to double the number.
- The clock values: The latency times, also called timings, describe how fast your RAM can react to requests from the processor. In CPU-Z you can see different clock values for this.
When choosing a memory kit, you need to make sure that you buy one that matches the type of memory you currently have. In addition, the clock should at least correspond to that of your current one.
This is how you install your new RAM
Time to put what you have learned into practice. Best of all, you usually don’t need any tools and the whole process shouldn’t take more than 10 minutes.
- Turn off your PC and disconnect it from the power supply. If you don’t have an anti-static wrist strap, you should first touch a heater or faucet to discharge yourself. This way you can be sure that no components are damaged by discharge.
- Open your PC. Usually, two thumbscrews have to be loosened for this. In rare cases, especially with finished PCs, you have to use a screwdriver.
- Locates the old RAM sticks and releases the latch located either on both or one side of the slots. As a rule, these are small brackets that you can fold outwards. You can recognize the RAM modules themselves by their elongated shape.
- Carefully pull the old RAM modules out of their slots. If you have released the lock, this should be done with little effort.
- Before you install the new memory, you should be aware of which slots you should best use. Usually, the second and fourth slot from the left is used. However, this can differ from mainboard to mainboard, which is why it is advisable to read the manual beforehand.
- Next, the new RAM modules are installed: These have a notch that matches the RAM slot. It is not physically possible to push the RAM sticks into the slot “the wrong way around” (without damaging either one). So check where the notch is and put the module the right way around in the slot. Then you push the stick evenly into the slot. A little more pressure may be necessary. The RAM module clicks into place and the retaining clips close automatically.
- And you’re done with that! Close your PC again and reconnect it to the power supply.